
|
|
|
|
Fast-forward to October 17, 2003
First, a note about the name BruinGilda. This was one of my
favorite characters from the old Saturday Night Live series played by Gilda
Radner. She was a hideous witch-like hag character with a good heart. The bus needed a name, so
why not? The AeroSwine part came from the flying pig
Outside
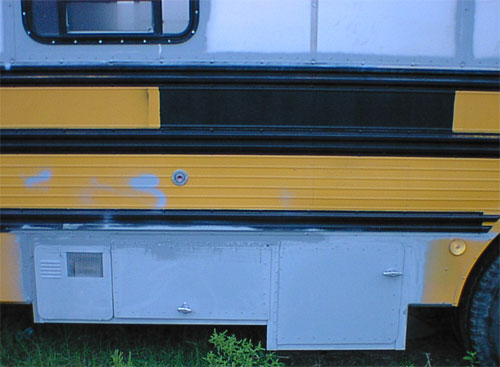
Shot of left bay. Water heater is mounted on left end. Left door for batteries, converter, back of water heater access, shore power cable, genset plug, water hose storage. Right door is for LP tanks. It will hold 4 tanks, but I will probably only run two on a new auto switching regulator and use extra space for storage. Since the floor is expanded metal, whatever is stored in here needs to be waterproof or in a waterproof box! The water inlet is above the left door. The kitchen window is right above that.
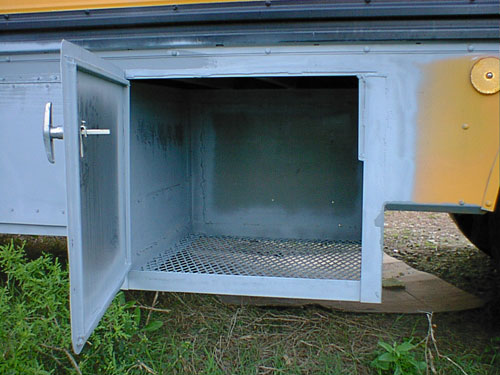
Shot of LP bay open for view. Not much to see right now, but a automatic switching LP reg and a minimum of two tanks will be installed. I have the reg, tanks, tank mounts and required plumbing to go to water heater, oven/stove, refrigerator and heater waiting to be installed.
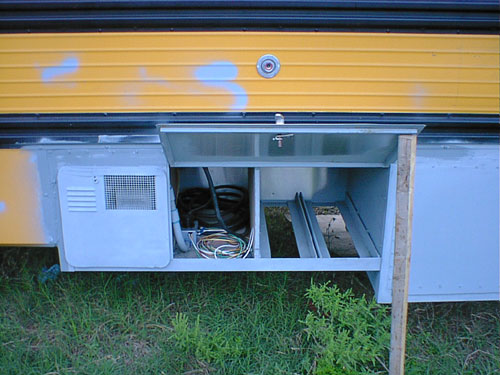
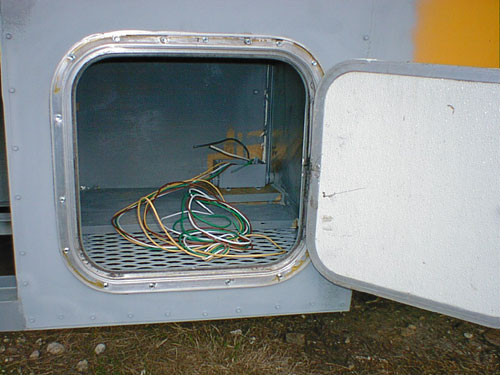
Shot of left bay door open. The plug on the left front comes from the genset mounted on the other side. The extra wires are for the remote start and hour meter for the genset. The remote start will mount inside with some additional switches for switching inverter/genset power on the TV and entertainment power, plus an additional switch from inverter to genset for microwave/coffee pot. The reason for the inverter/genset/shorepower switching is if I am at a quiet place and don't want to start the genset for some early morning coffee, micro waved goodies or to watch a little early morning news, I don't have to wake up the countryside. The genset is a quietpack, but it doesn't hurt to be considerate of your neighbors. There will be additional switches in the same panel for water pump, A/C thermostat power, heater power, etc. I have an automatic prop for the door that I removed from the 5th wheel, just haven't installed it yet.
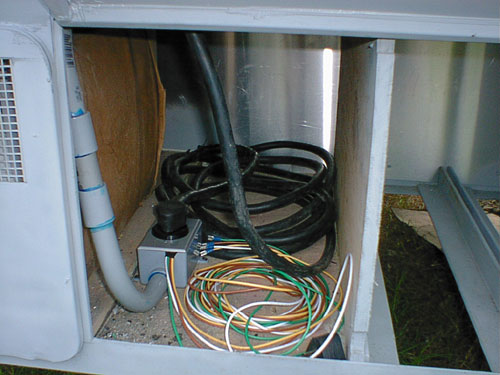
Close up of shore power plug plugged into plug from genset. I can unplug from genset and plug into shore power if I am near power or at home. The colored wires are for remote start/stop/hour meter for genset and will run thru the hole in top of the bay to the remote switch panel mounted inside near the front end of the kitchen cabinets. The shore power wire comes thru the floor from the breaker panel mounted on the inside of the bus in the area under the kitchen cabinets, too.
Picture of the door and box on the front of the right bay. This is the junction box for the genset power to the bay on the other side for the genset plug. The multicolored wires splice into a plug that mates with another genset plug for remote start. The battery for the genset mounts in the front of the bay on the expanded metal. The genset mounts to the left of this area on the angle iron frame as it breathes from the bottom. I placed it on this side as the cool air enters on the right side of the genset, so hot air goes out the back while driving. There is a 4 x 6 hole to the generator for wiring and battery hookup. The outside of the bus is almost ready for primer and painting, just a few more details. It is sealed now, so I can work inside on bad days and outside on good ones.
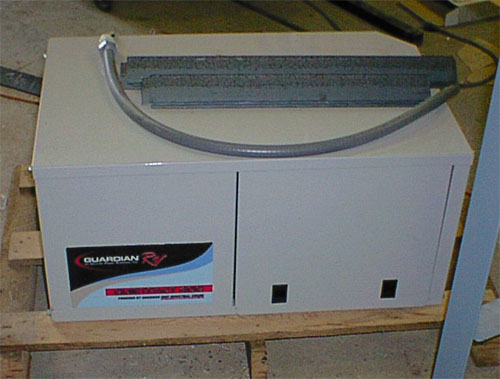
Here is a shot of the genset waiting for it's time to go in the hole. It's a Generac Quietpac G40. The angle iron on top is precut black/grey water tank supports. The flex line on top plugs directly into the junction box in the previous picture and wires to the power plug. This was bought new from www.norwall.com. Good prices and fast service. They also sell other brands if Generac is not your cup of tea. The bay it fits into has about 3 times the required minimum space around the genset and has insulation between the box and the bus floor. It should be reasonably quiet inside the bus with the genset running, but time will tell.
Picture of the black(in front) and grey water tanks waiting their time to be installed. The bag in front of them contains the grommets for all 3 tanks and offset reducer from 3" to 1.5" for grey water tank. I may keep the grey outlet at 3" size for quick draining. Grey tank is 40 gallons and black is 33 gallons. The fresh water tank is 95 gallons, so I will have to watch the water levels and not overfill the grey or black tanks. I have already test fit them into place, but can't mount them yet as I need to do final placement of the interior bathroom/bedroom wall so I can locate the drains and vents from top and drill holes to match, then drill holes and install grommets in tanks. They are both new. I got them and the fresh water tank and tank grommets from www.tank-depot.com. They have a large variety of pre-made sizes to fit just about anything.
Here is a picture of the angle iron mounted to the box frame for the black/grey water tanks. There are straps on the front to limit forward travel. The grey mounts on the left and the black mounts on the center. They will be wrapped with 3/4 plywood on bottom and 1/2 plywood on sides. The angle iron in the picture of the genset above will go across the bottom to hold the weight. The tanks will be padded with spray foam on top after they are installed. The outlets will point to the back for the drain valve hookups. Since a skoolie is pretty high off the ground, they should drain well when required! The underside will get a good coat of undercoating before tanks are mounted.
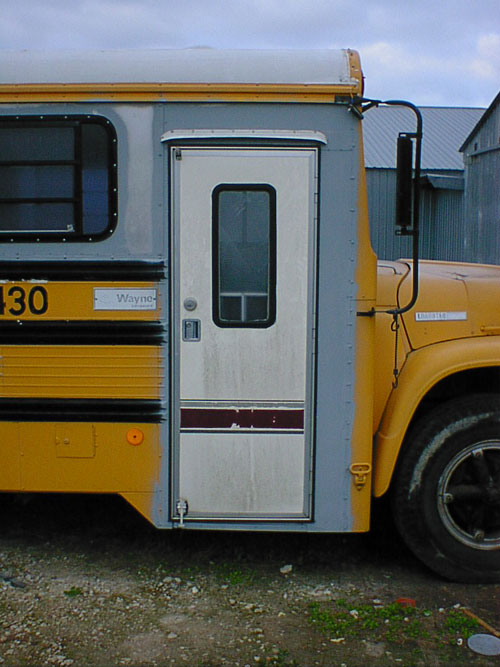
A picture of the door with a clear plexiglass temporary window. It is in until a piece of clear safety glass can be fitted. I took the original out for the glass cutter to use as a template.
INSIDE
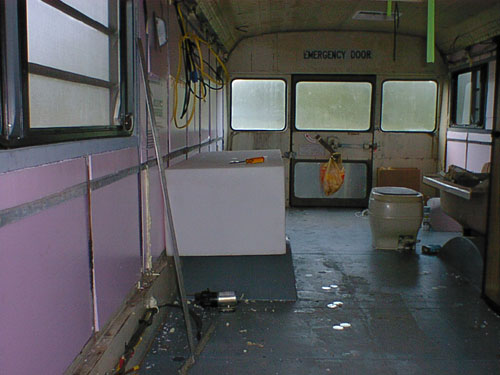
Looking towards the back right from the front. The two small windows on each side of the back door will be skinned on the outside and inside and insulated with sheet/spray foam. The center window may be changed for a smaller one later but will just have curtains for now. The fresh water tank on the left will be mounted lower. The pump will be mounted under the front the area will provide some additional storage. The area above the tank will be for three things. A closet for the bedroom in the back, a pantry opening to the center for the kitchen and an entertainment center facing front for TV/DVD/VCR/X-Box etc. The antenna power, antenna feed and switched power cables can be seen hanging near the wall. The foam in the walls is cut and fit pretty tightly, there are two 3/4 inch sheets for a total of 1.5 inches or about R-8. The ceiling was pulled down on the edges and sheet form was stuffed into the 2 feet on each side that had no insulation. The center 4 feet is insulated with fiberglass insulation, so I left that alone and concentrated on the sides. After the sheet foam was stuffed into the roof, the edge was reattached and spray foam was used to fill the voids thru drilled holes. After the insulation, the bus is really quiet and draft free now. The floor has had the holes from the seats and floor strips sealed and coated with a heavy coat of epoxy primer.
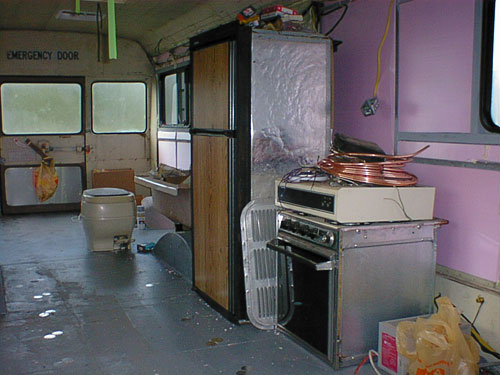
Looking towards the left back from the front. The bedroom/workroom will be in the back behind the bathroom. The sit down tub and toilet are behind the refrigerator. The refrigerator and stove/oven will go back about 2 feet, but the cabinet will have an elevated floor under the refrigerator over the wheel well. The refrigerator side vent is leaning on the refrigerator. The stove/oven and vent hood will mount right next to the refrigerator. The sink will mount under the window on the right edge of the picture. The yellow ribbon hanging from the ceiling is tied to the A/C to keep me from walking into it! You can see the converter/charger from the 5th wheel next to the oven. The ceiling, front and back metal walls are ready for paint, then serious interior finish work.
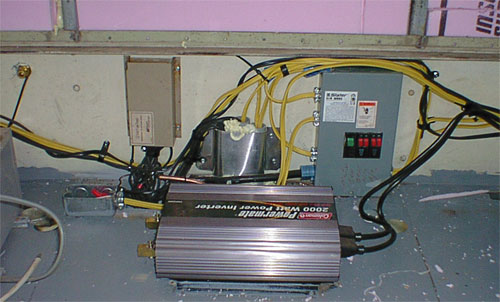
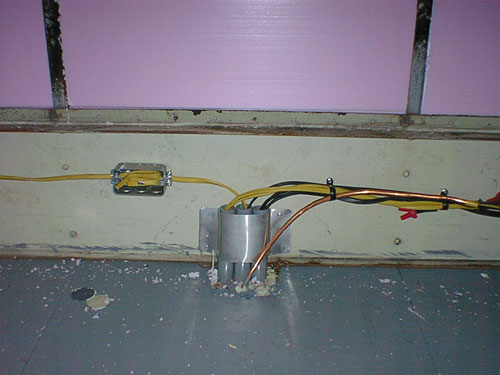
Here is a picture of electrical central! This will be under the kitchen cabinet for easy access if needed. From left to right :Just the edge of the converter/charger that was replaced with a smart charger with Charge Wizard panel. This will be mounted on the cabinet wall. That plug on the floor is what the converter/charger will plug into and will also be mounted on wall. This will be switched so I can control it from inside with the other electrical stuff. The water inlet for filling tanks or using water when parked is in the upper left corner of the picture. The cream colored box is the 12v fuse panel. Just to the right of the fuse panel is the conduit that leads to the other side of the bus thru the floor inside an enclosed and insulated duct. The breaker panel is on the right and controls 120V AC power. The input power cable is on the bottom left and goes thru a hole in the floor and down into the bay below. The 2000W/4000W peak inverter will be mounted on the wall inside the cabinet. The heavy cables provided with the inverter are not installed yet, but they will go down thru the floor and attach to the battery bank. The output from the inverter goes thru the two black cables plugged into the right side to the switch panel so the input to the entertainment center and microwave/coffee pot can be switched between shore power/genset or inverter power.
This is a picture of the conduit that goes under the floor to the other side. The 12V, AC and water line run thru the insulated duct from side and side. The wires will be enclosed in a wooden box running from front to back. I wanted to leave the steel impact strip on the inside just in case and had to implement this into the interior. I will put a 2x2 on top and bottom and screw plywood to these. This will cover the wiring and plumbing and provide access later if needed.
It's October 17th when these pictures were taken, work is continuing.
|
Send mail to info@pettypb.com with
questions or comments about this web site.
|


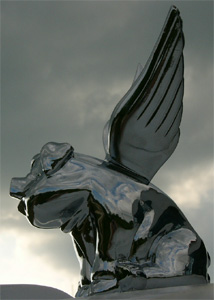
 avatar I use on various
forums related to paintball. I was looking thru the good ole J. C. Whitney
catalog one day and found a hood ornament of a pig with wings. I knew right away
this was the perfect hood ornament for BruinGilda: The AeroSwine! OK, on
with the bus construction details
avatar I use on various
forums related to paintball. I was looking thru the good ole J. C. Whitney
catalog one day and found a hood ornament of a pig with wings. I knew right away
this was the perfect hood ornament for BruinGilda: The AeroSwine! OK, on
with the bus construction details