
|
|
|
|
It's February 8, 2004 More progress...Still working away.
OUTSIDE
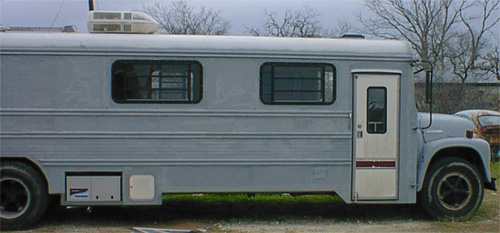
Right side in mostly gray primer. The genset is mounted and wired. The only yellow still showing is a ring around the windshield and around the three marker lights in center on the front. The outside is complete except for final painting of the outside and roof and adding the 18' awning on this side. Oh yeah, marker lights and reflectors.
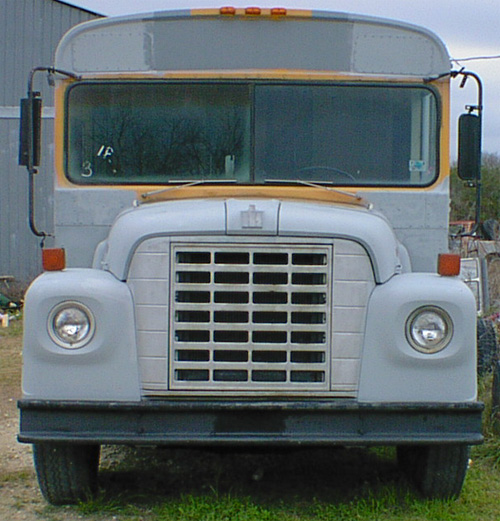
Front flasher holes filled in, spray foamed, sealed and primed. Bug eye mirrors were removed from front fenders The body will be white over black with gloss black bumpers, rims, headlight rings, grill area, mirrors, window frames and maybe some stripes or other highlights, but I am just trying to get the YELLOW OFF right now! With the original windows removed and replaced with the ones from the 5th wheel in selected places, it is more like a home, not a glass house or fishbowl!
This is a shot of the battery compartment for the genset. The power feed harness and remote wires from the genset enters on the left side, goes thru a sealed box and passes thru the floor to the other side to the genset power plug in the front compartment. The hot wire is disconnected at the battery for safety right now.
Here is a shot of the quiet pack genset mounted in the side of the bus. The exhaust exits out in front of the right rear tire. The door on the right side is for servicing the genset - I have to come up with a lock of some kind to keep it from leaving without permission, the door in the right edge of the picture is the battery compartment in the picture above. There is plenty of air space for this genset - the hole was made to hold a Honda EV4010 later.....
Bad picture...there are actually 4 -6V golf cart batteries in there....all connected via 2/0 hand soldered battery cables to the 2KW/4KW surge inverter and to power all the rest of the 12V stuff like water pump, lights, refrigerator board, vents, A/C thermostat. They are fed by a 40 amp Progressive Dynamics charger with Charge Wizard.
INSIDE
Here is a "stitched" picture of the interior from the front door - the right half is darker. With the exception of the cabinet doors and drawers and a panel in the center of the back door, the most of the interior woodwork is complete. All of the 12V and 120V electronic systems have been tested and are working while this photo was taken - the bus is running off of shore power now. Both pressure and drain sides of plumbing are complete. The LP has been leak down tested and is complete and working. Other additions are folding doors on bathroom and bedroom, smoke and CO alarms, interior trim rings on all windows, Formica on countertop, etc. An LP alarm is on order.
A shot of the butcher block Formica on the kitchen cabinet. Sink, stove, stove hood, window trim ring, microwave are all mounted and working.
Grand central station under the sink.
Another shot of the interior with the folding doors to the bedroom and bathroom closed.
There is one by each door.
Pump and bypass valve behind door under front of combo cabinet. The pump is mounted on extra thick rubber feet and has flex lines on the inlet and outlet. The combination of these two makes a very quiet pump installation - you are barely able to hear the pump at all - just enough to KNOW IT IS WORKING. The bypass valve in the right side allows you to open the valve and "bypass" the check valve in the pump and fill the storage tank from the same water inlet you would use at a park.
32 degrees and holding in the freezer compartment!
Microwave keeping time on shore power.....Space next to it is reserved for the coffee pot.
These pictures were taken February 8, 2004 work is continuing.
|
Send mail to info@pettypb.com with
questions or comments about this web site.
|